
If you are wondering how to tile a bathroom floor, you’ve come to the right place. Whether you’re looking to spruce up a tired space or you are designing a whole new bathroom, we’ve gathered all the tips and tricks you need to for this DIY.
‘It’s easy to see why tiles are such a popular choice for bathroom floors, says Abbas Youssefi, Director of Porcelain Superstore. ‘With the charm of wood, the hardness of stone and the durability of vinyl, they’ll offer a long lasting, stylish look in any space.
‘But to ensure a long-lasting finish,’ Abbas warns, ‘it’s vital that your new tiles are correctly installed, to avoid any issues further down the line.’
While you could hire a professional tiler to ensure the job is done correctly, tiling a bathroom floor is definitely achievable if you prefer to do it yourself. So, whether you're to embark on this DIY or you’re just looking for insight into the process before you fully commit, read on for everything you need to know about tiling a bathroom floor, with some key tips from experts along the way.
How to tile a bathroom floor – everything you need to know in 9 easy steps
You will need:
- Your tiles of choice
- Tile adhesive and grout
- Tile cutter
- Floor primer
- Spacers
- Tape measure
- Notched trowel
- Grout float
- Spirit level
- Rubber mallet
- Safety gear (gloves, goggles and knee pads)

1. Prepare the bathroom for tiling
As always, the key to a great finish is all the preparation.
‘It’s vital to think of your bathroom tiles as the foundations that your bathroom is being built on – you can’t have unstable or badly executed foundations, otherwise, the finish will be poor,’ says Amanda Telford, marketing manager at CTD Tiles.
To do this, ‘you need to make sure the surface you’re tiling onto is as flat as possible,’ Amanda says. ‘You may need to consider the use of an anti-crack mat or membrane, or tile backer boards to create a surface that is flat and will bear the weight of your chosen tiles, as well as the adhesive and grout.’
2. Plan out how you would like your tiles to look
Much liking tiling a bathroom wall, to make sure you get the most out of full tiles, rather than having to cut lots down, start from the center of the floor and dry lay your tiles outwards from there. Use spacers even at this early stage so you know exactly how many full tiles you can lay. Once you are happy with the dry run, then you can start marking where your first row of tiles will be laid.
3. Prime your bathroom floor
‘Priming is a vital – yet often overlooked – component of tiling,’ says Abbas. ‘Priming helps to stabilize and seal the surface, increasing the strength of the adhesive bond and prolonging the ‘working’ time. Usually, you want the primer to be touch dry before applying the adhesive.’
Using an acrylic primer before you tile your bathroom floor improves water resistance and the strength of the adhesive. To prime the floor, ensure it is free of dirt, grease, and debris, and then apply the primer with a clean brush, sponge or roller. Leave to dry, and apply a second coat if required.
4. Choose and mix the floor adhesive
‘When undertaking any floor tiling, it’s always important to use a cement-based floor tile adhesive,’ says Mike Head, director of Atlas Ceramics.
If you are confident using cement, use an electric mixer. If you are just starting out, use a bucket trowel.
‘It’s important that you follow the manufacturer’s instructions on the bag, relating to the correct quantities of water and the correct ratios of powder to make sure that you get the correct consistency, which should not be too runny,’ Mike adds. ‘Ideally, when you lift some adhesive from the bucket on the bucket trowel and hold it on its side, it should hang off the trowel for a few seconds before falling off.
‘Before you do any mixing, remember to put your safety wear on, gloves, goggles, and a dust mask. Until you’re confident, only mix up as much tile adhesive as you require, to avoid excessive wastage.’
5. Apply the adhesive to the floor
Start by using a notched trowel to apply an even layer of adhesive across a one-meter square section. Working in smaller sections will ensure the adhesive won't dry as you work. For larger tiles, (over 60 x 60 cm) apply adhesive to the back of the tile too to create an even stronger bond.
6. Lay the tiles on the bathroom floor
‘Place the first tile onto the start line you marked out on the floor earlier,’ says Mike. ‘Jiggle it softly, and apply a small amount of pressure, to ensure it is firmly bedded.
‘Take a spirit level and lay it over the tile to ensure its level side-to-side and top-to-bottom. If it’s a little out, just tap the tile until it sits level. You can use a rubber mallet to do this or, alternatively, use the handle of the trowel or your fist. Once you’ve given it a tap, put the spirit level back on, and check its current level. Repeat the process with the next tile – using a spacer to keep your grout joint.’
‘Continuously check the quality of your work as you go,’ Abbas advises. ‘In particular: Are the tiles running straight and level? Are they flat with no obvious lips between tiles? Are they – and the joints between – clear of adhesive?
'Where necessary, you’ll need to remove and re-fit tiles you’re not happy with. It’s much easier now than once the adhesive has set!’

7. Cutting tiles down to size
'It’s more than likely that you're going to have to cut some tiles, especially around the edges of your room. If you are not confident doing this yourself, enlist a professional.
‘A manual tile cutter can be used for any straight cuts,’ Abbas recommends. ‘These provide a quick and clean cutting method. For more complex cuts, we’d recommend a ‘wet’ tile cutter – they’re safer than an angle grinder. With either cutter, you will need to use a high-quality diamond blade or wheel. As a seasoned pro will tell you, it’s best to “measure twice and cut once.”’
8. Grouting the bathroom floor tiles
Wait until the adhesive has fully cured, then clean the tiles and start mixing the grout, following the manufacturer’s instructions.
Once your grout is at the desired consistency, allow it to stand for a few minutes just to harden a little and then mix again.
‘Applying the grout is relatively straightforward: Add some grout to your grout float. Hold the float at a 45-degree angle and run the grout across the surface of your tiles,’ Abbas explains. ‘Work in diagonal lines to your joints, to help push the grout into the gaps. Work in smaller sections until you feel more comfortable. Try and remove excess grout from the tiles as you work.’
9. Clean your bathroom floor tiles
When you have finished grouting make sure to remove the grout haze: ‘There’s a good chance that the surface of the tiles is covered in grout haze, which can sometimes be almost-invisible,’ says Abbas.
Over time, this haze can cause the tiles to appear dirty as it’ll attract and trap dirt and dust. You can easily remove the haze by polishing the tiles with a dry microfibre cloth, once the grout has almost set. For any stubborn grout haze stains, we’d recommend using a specialist grout haze remover.'

What type of tiles are the best to use when tiling the bathroom floor?
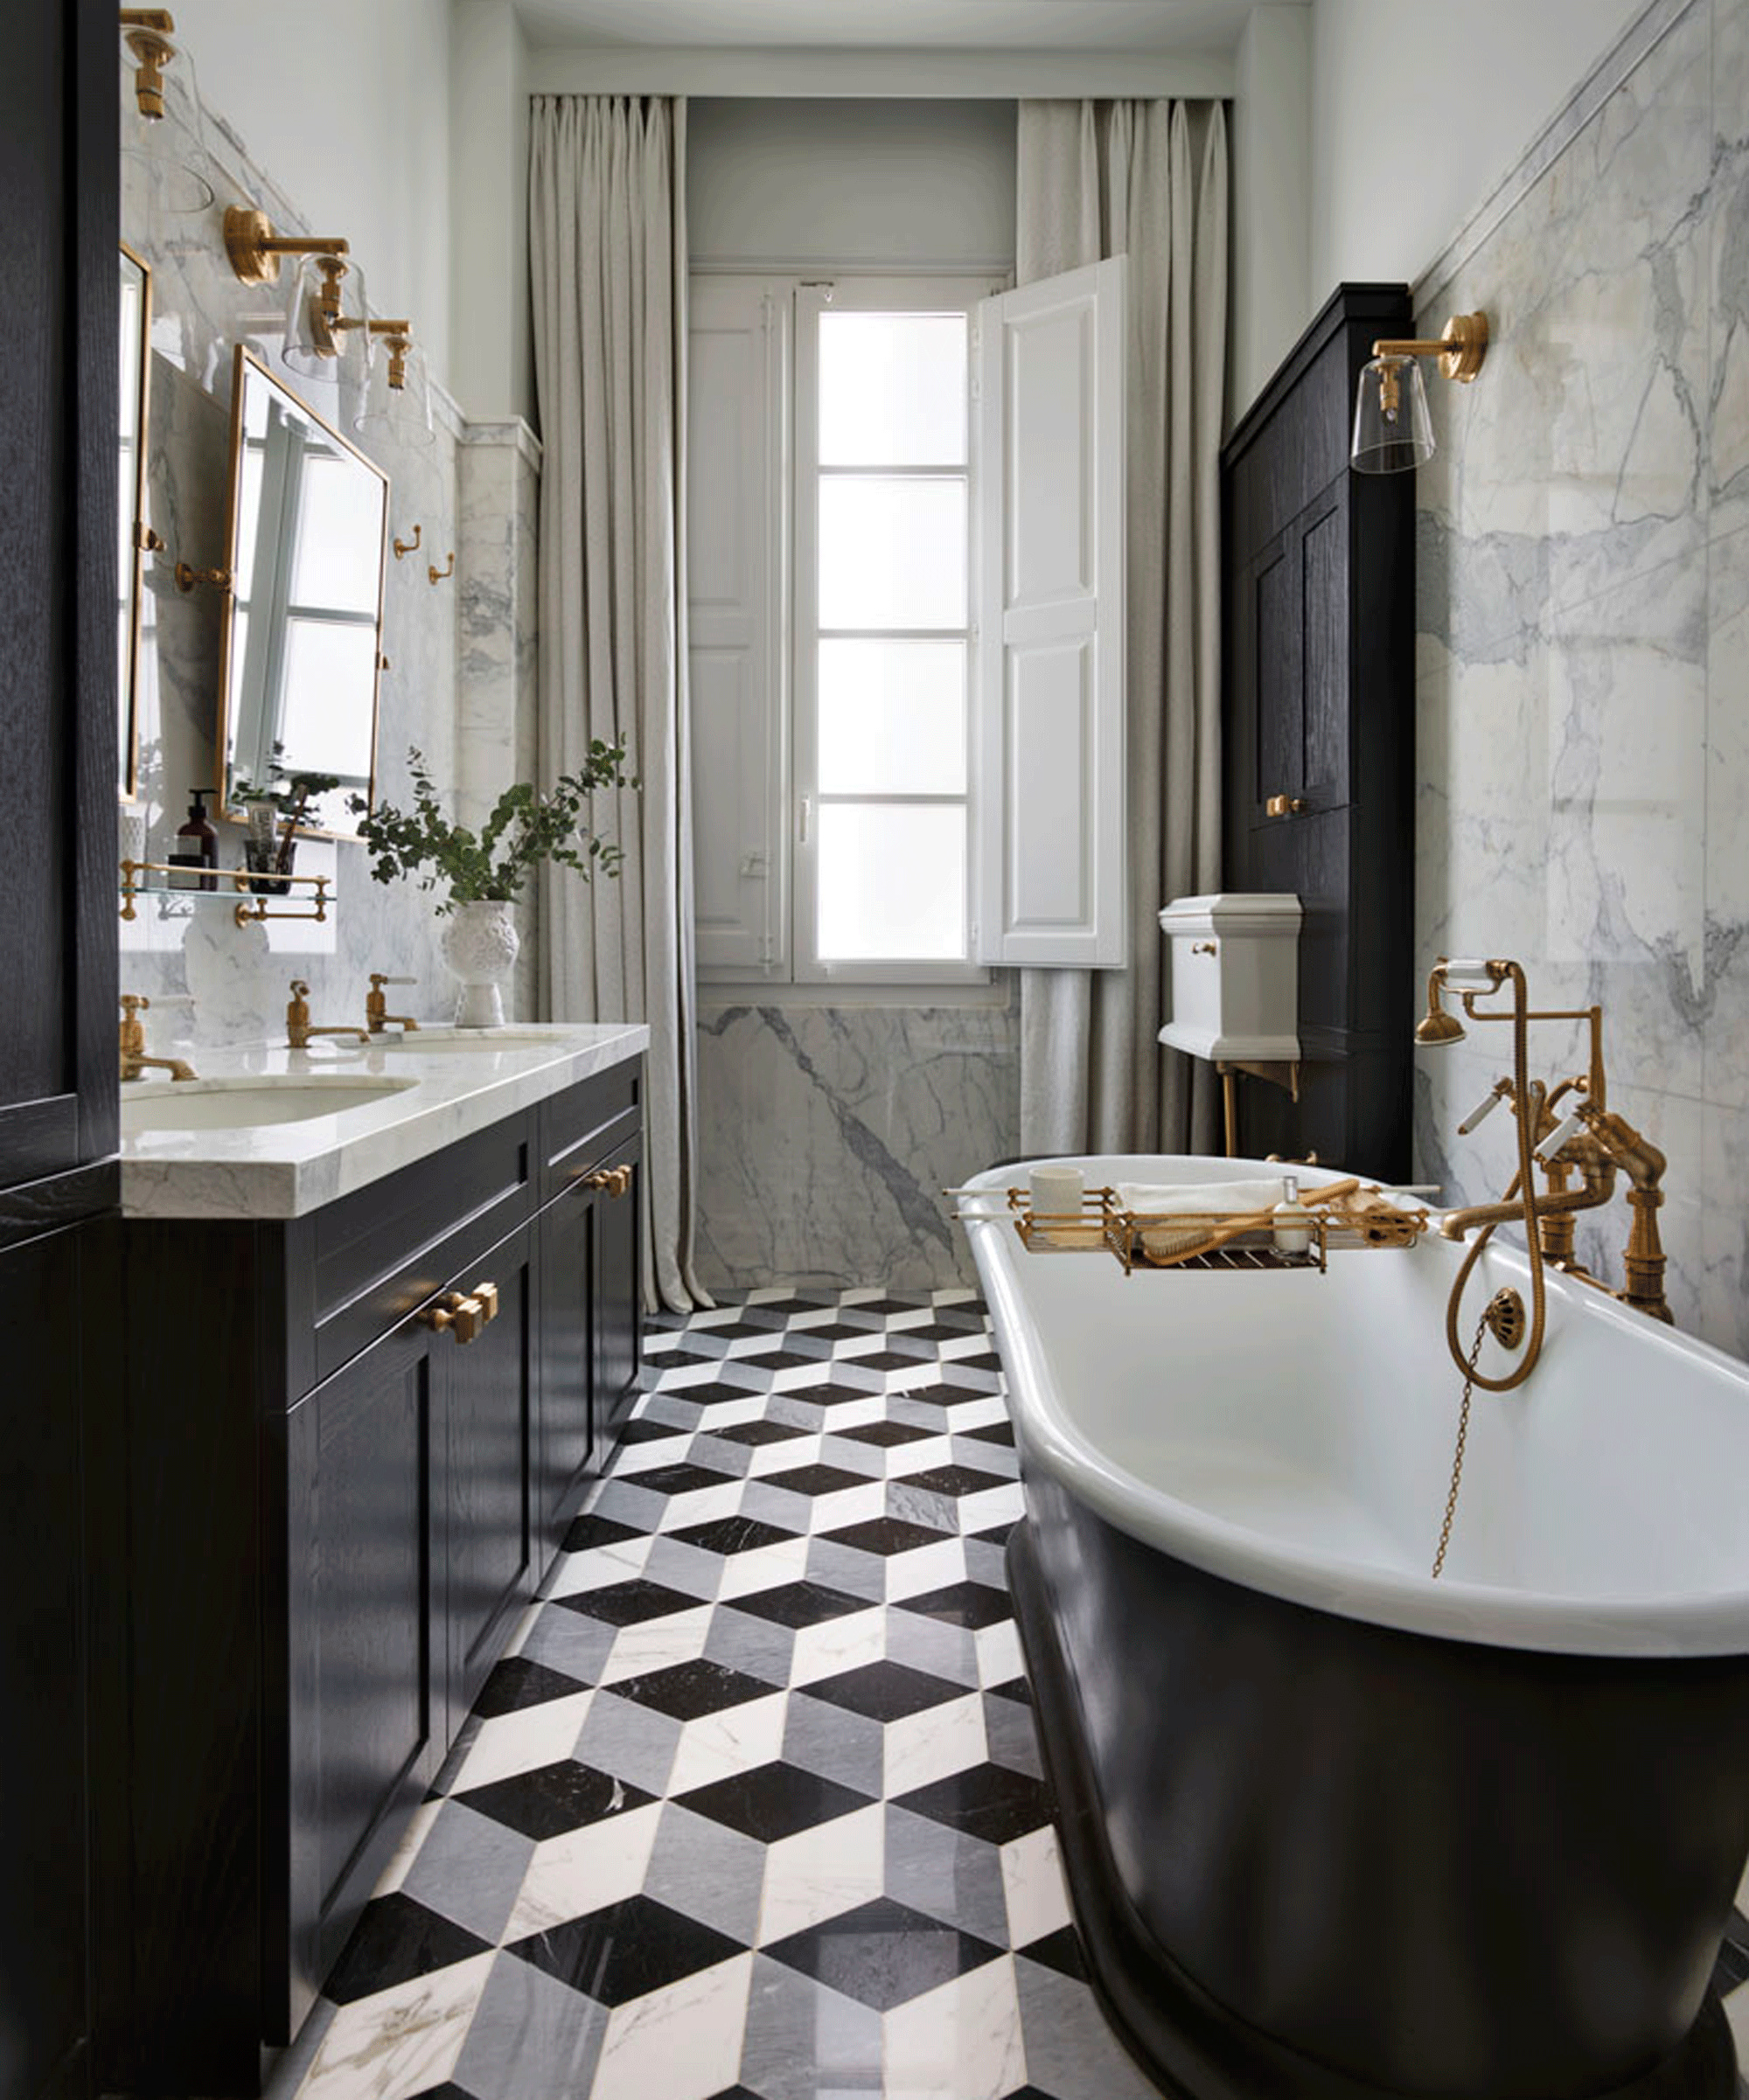
‘We would recommend using porcelain tiles on your floors as they are hardwearing and more suited to a busy, heavy footfall environment,’ says Amanda. ‘For those that are also planning to tile the floor that goes into the shower or wet rooms, we would recommend using anti-slip tiles or tiles with some texture and structure for grip underfoot.’
What adhesive should I use when tiling the bathroom floor?
‘For floor tiling, it’s imperative to use a cement-based flexible tile adhesive. These are generally available with different drying times and colors. Use white adhesive with lighter grout colors. Use grey adhesive with grey and darker grout colors.’ Abbas adds.
How do you know if your bathroom floor or wall tiles are repairable?
If you already have a tiled bathroom floor, assess the state of your tiles before you commit to a complete replacement.
‘Smaller chips and cracks will usually be repairable, saving you the time and expense of replacing individual pieces or the entire set,’ says Rachael Meadowcroft, product manager at Ronseal.
‘If tiles are discolored or no longer fit with a new bathroom suite or color scheme, you can paint them to create a fresh, new look,’ she adds. ‘There are lots of simple to use DIY repair kits on the market which offer a time and cost-effective way to carry out minor repairs.’